Among the most common editing operations are cutting, copying, and pasting text. CKEditor not only supports these operations but also makes it possible to affect the formatting of the pasted text and even paste a Microsoft Word formatted fragment.
For general information on using dialog windows please refer to the Dialog Windows section of the User's Guide.
Contents |
Cut
To cut a text fragment, start with selecting it. When the text is selected, you can cut it using one of the following methods:
- Press the
 button on the toolbar.
 - Open the CKEditor context menu for the selected fragment by pressing the right mouse button, the Menu/Application key, or the Shift+F10 keyboard shortcut, and choose the Cut command.
- Use the Ctrl+X shortcut on your keyboard. Note this method works even when the browser blocks CKEditor toolbar's access to the clipboard, so this is the most reliable way of cutting the text.
Copy
To copy a text fragment, start with selecting it. When the text is selected, you can copy it using one of the following methods:
- Press the
 button on the toolbar.
 - Open the CKEditor context menu for the selected fragment by pressing the right mouse button, the Menu/Application key, or the Shift+F10 keyboard shortcut, and choose the Copy command.
- Use the Ctrl+C shortcut on your keyboard. Note this method works even when the browser blocks CKEditor toolbar's access to the clipboard, so this is the most reliable way of copying the text.
Paste
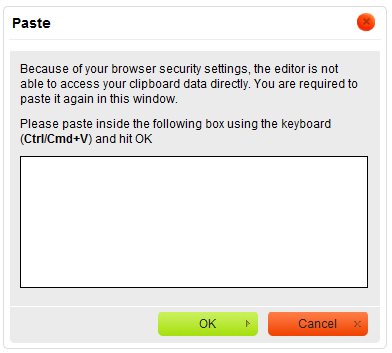
To paste a text fragment, start with cutting it or copying from another source. Depending on the security settings of your browser, you may either paste directly from the clipboard or use CKEditorPaste dialog window.
When the text is in the clipboard, you can paste it using one of the following methods:
- Press the
 button on the toolbar.
 - Open the CKEditor context menu for the selected fragment by pressing the right mouse button, the Menu/Application key, or the Shift+F10 keyboard shortcut, and choose the Paste command.
- Use the Ctrl+V shortcut on your keyboard. Note this method works even when the browser blocks CKEditor toolbar's access to the clipboard, so this is the most reliable way of pasting the text.
If direct access to clipboard is blocked, you will be asked to paste the text into the Paste dialog window using the Ctrl+V keyboard shortcut.
Paste from Word
CKEditor allows you to preserve basic formatting when you paste a text fragment from Microsoft Word. To achieve this, copy the text in a Word document and paste it using one of the following methods:
- Press the
 button on the toolbar.
 - Use the Ctrl+V shortcut on your keyboard. Note this method works even when the browser blocks CKEditor toolbar's access to the clipboard, so this is the most reliable way of pasting the text.
Paste as Plain Text
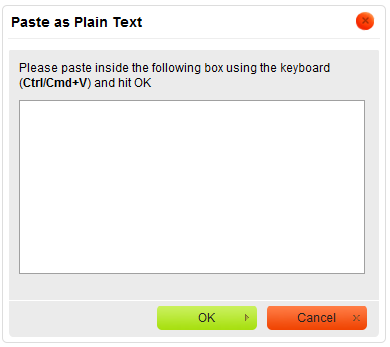
If you want to paste an already formatted text, but without preserving the formatting, you can paste it as plain text. To achieve this, copy the formatted text and press the ![]() button on the toolbar. If the browser blocks CKEditor toolbar's access to clipboard, a Paste as Plain Text dialog window will appear and you will be asked to paste the fragment into the text box using the Ctrl+V keyboard shortcut.
button on the toolbar. If the browser blocks CKEditor toolbar's access to clipboard, a Paste as Plain Text dialog window will appear and you will be asked to paste the fragment into the text box using the Ctrl+V keyboard shortcut.
Once pasted into the document, the text will lose all its formatting and you will be able to style it using CKEditor options.
-------------------------------------------------------------------------------------------------------------------------------------------------------------------------------------------------------------------------------------------------------------------------------------------------------------------------------------------
https://documentation.cpanel.net/display/ALD/HTML+Editor
For cPanel & WHM 11.48
(Home >> Files >> File Manager)
Overview
The HTML Editor interface allows you to easily edit your HTML documents from the File Manager interface (Home >> Files >> File Manager). This visual (WYSIWYG) HTML editor includes powerful editing functions of familiar desktop editors (for example, Microsoft® Word).
Notes:
- Due to customization, the screenshots in this guide may not match the HTML Editor interface that you see. The table below lists all of the HTML Editor interface's features.
- The HTML Editor interface uses CKEditor functionality. For more information, read the CKEditor Users Guide.
Toolbar
The table below lists the tools that you can use when you edit a file in the HTML Editor interface:
Insert an image
To insert an image, perform the following steps:
- Click the Image tool icon () in the toolbar. The editor displays the Image Properties window. The Image Properties window includes the following tabs:
- Image Info (default) — Sets the image URL and manipulates how it displays in the document.
- Link — Creates an image link, which can point to, for example, another web page or a document.
- Upload — Stores your images on the server, where you can retrieve them without your local computer.
-
Advanced — Configures image options (for example, ID assignments, classes, tooltips, or CSS properties).
Note:
You should only use the Advanced tab if you understand HTML and CSS.
- Confirm your options in the Preview window and click OK.
For more information about the Image Properties window, read the CKEditor Users Guide.
Note:
If you enabled cPanel's HotLink Protection feature (Home >> Security >> Hotlink Protection) and your list of enabled hotlinks excludes your primary domain account, you may not see embedded images. Add your primary domain to the URLs to allow access list to fix this problem.
File Browser
The Browse Server option directs you to the HTML Editor interface's File Browser feature. Use this feature to browse, upload, and manage images on the cPanel web server.
This interface includes the following sections:
- Toolbar — A series of buttons that quickly execute specific file browser functions.
- — Move up or down levels of folders.
- — View more information for the selected file.
- Folders pane — Organizes the folder hierarchy for easy navigation. Use the arrows to expand and collapse the different hierarchical levels.
- Files pane — Lists the files available in the selected folder.
- Status bar — The section at the bottom of the interface that displays information about, for example, the selected file or the total number of files in the folder.
Additional documentation
Guide to HTML Editor Integration — Read this documentation for more information about how to integrate the HTML Editor interface into cloned cPanel x3themes.
=====================================================================================================================================================================
https://www.siteground.com/tutorials/cpanel/file_manager.htm
File Manager Tutorial
The File Manager allows you to manage your site through HTTP rather than an FTP tool or other third-party application. You can upload, create or delete files, organize files in folders and change file permissions. While not as sophisticated as most FTP tools, File Manager gives you all the basic functionality necessary to manage your site.
File Manager Detailed Tutorial
- How to access the File Manager?
- Creating a new folder
- Uploading files in File Manager
- Creating a new file
- Editing a file
- Extracting/Compressing a file
How to access the File Manager
To access the File Manager click on the corresponding icon in the Files section of your cPanel.

Then you will be able to pick the directory for which to open File Manager:

The File Manager appears as follows:

Creating a new folder
Folders are a very useful way of adding an organization and a structure to your account. They make the maintenance of the site much easier. You can easily list the files in every folder. Most web sites include at least an /image folder to keep all the image files separately.
STEP 1Click on the New Folder link.

STEP 2Enter the name of the new folder and define the location where it will be created.
STEP 3Click on the Create New Folder button. The new folder will appear in the chosen location.
Uploading files in File Manager
You can start uploading files through File Manager by clicking on the Upload icon.

How to upload files in File Manager:
STEP 1Navigate to the folder where you want to upload your files.
STEP 2Click on the Upload icon.
STEP 3Click on the Browse button next to one of the top fields.
STEP 4Search for and double-click on the first file to upload. The upload will start automatically.
STEP 5Repeat the above steps for each file you want to upload.
STEP 6: Click on the Overwrite existing files check box if you want to overwrite existing files with the same name.
You can download files from the server to your personal computer through the Download option.
You can copy and move files between the account's folders through the Copy and Move File functionalities. You can Rename and Delete the existing files through the corresponding options.
Creating a new file
For small files it can be easier to create them online rather than on your home computer.

To create a new file please follow the steps listed below:
STEP 1Step 1: Click on the New File link.
STEP 2Enter the name of the file to be created. Please mind to add the correct extension. For example if you create a Perl file, the extension will be .pl.
STEP 3Pick the destination where the file should be saved and click on the Create New File button. The file is created.
Editing a file
Editing an existing file through the File Manager allows you to make immediate changes to your web site without having to upload a new version of the file. This is useful for small changes but would be inefficient for large alterations. To edit a file please follow the steps below:
STEP 1Navigate to the folder where the file is located.
STEP 2Click on the name of the file.
STEP 3Click on the Edit link in the top menu of your window. This will open a new window with the content of the file displayed.
STEP 4Alter the text of the file.
STEP 5Click on the Save Changes button when you are ready. The file is saved and the changes will take effect from now on.
You can use more sophisticated editors as the Code Editor and the HTML Editor. You can also click on the View link in the File Manager main menu. The file will be opened for reading and you will not be able to edit it.
Extracting/Compressing a file
You can extract archive files using the Extract function.

You can also create your own archives. Select the files and folders which you want to include in the archive, click Compress and then Compress File(s).

SiteGround is not affiliated with or endorsed by the cPanel Project or its trademark owners.


